


❕This article has not been completed yet. However, it may already contain helpful Information and therefore it has been published at this stage
Introduction:
Data collection rules (DCRs) are part of a modern data collection strategy that improves upon traditional methods. They provide a standardized approach to configuring data ingestion from various sources, making the process more manageable and scalable.DCRs allow users to define how data is collected, transformed, and sent to a destination,such as a Log Analytics workspace.
This functionality (also known as Log Splitting) can be used for a variety of reasons:
- cost optimization
- normalization
- enrichment
- removing sensitive data
- and granular access configuration
The benefits and costs of this technology depend on how you split the logs and where you transfer them. Therefore, you need to carefully design your sentinel and data collection rules.
Two target scenarios will now be discussed in more detail.
- Send information to a secondary Basic or Auxiliary logs table
Basic and Auxiliary tables offer a significantly lower cost compared to Analytics tables, making them attractive for cost-saving strategies. However, these tiers come with important limitations:
- They have strict retention policies.
- KQL query capabilities are heavily restricted.
- They cannot be used in alert rules.
These constraints are critical and can impact operational flexibility. Additionally, not all tables are eligible to be switched to Basic or Auxiliary tiers, which further limits their applicability. - Send data to a secondary Analytics table with customized retention or archiving settings
Microsoft Sentinel provides free data retention for the first 90 days. Beyond that, extended retention or archiving incurs additional costs. To optimize expenses, you can configure tables with different retention periods and route logs accordingly. This allows you to retain critical data longer while rolling out less essential logs earlier - helping reduce storage costs without compromising operational needs.
For more information see:
- https://docs.azure.cn/en-us/azure-monitor/logs/data-platform-logs#table-plans
ℹ️ Info: Another cost-effective option that enables long-term storage and advanced analytics without the traditional limitations of SIEM is the use of the data lake layer.
For more information see:
- https://learn.microsoft.com/en-us/azure/sentinel/datalake/sentinel-lake-overview
- https://techcommunity.microsoft.com/blog/microsoft-security-blog/microsoft-sentinel%E2%80%99s-new-data-lake-cut-costs--boost-threat-detection/4445281
💡Good to know: When a connector is enabled and the data lake feature is activated, data is automatically sent to the analytics tier and mirrored in the data lake tier by default. Mirroring data in the data lake with the same retention as the analytics tier doesn't incur additional billing charges.
Subsequently, only the first scenario mentioned above will be discussed step by step without further elaborating on the data lake option.
How to Use Workspace Transformation Rules to Send Azure Diagnostic Logs to Secondary Analytics or Auxiliary Tables
Prerequisites
- An Azure Subscription
- Azure Contributor rights
- A pre-existing Resource Group (ideally named "rg-sentinel-001")
- A Log Analytics Workspace (ideally named "log-sentinel-001")
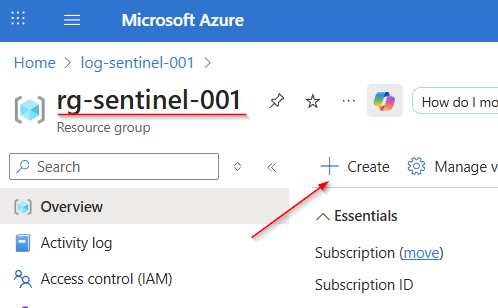
Navigate to the Resource Group (or create one, see link), where you want to deploy your resources for this hands-on lab. Click on "Create"
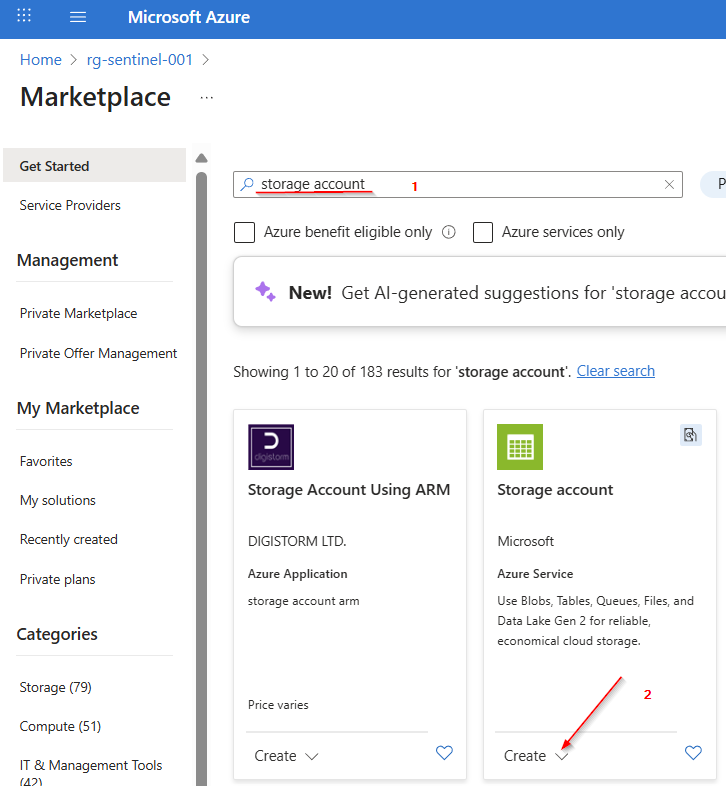
Enter "storage account" in the search field. Click the "Create" button under Microsoft's Storage Account offering, then select the "Storage account" option.
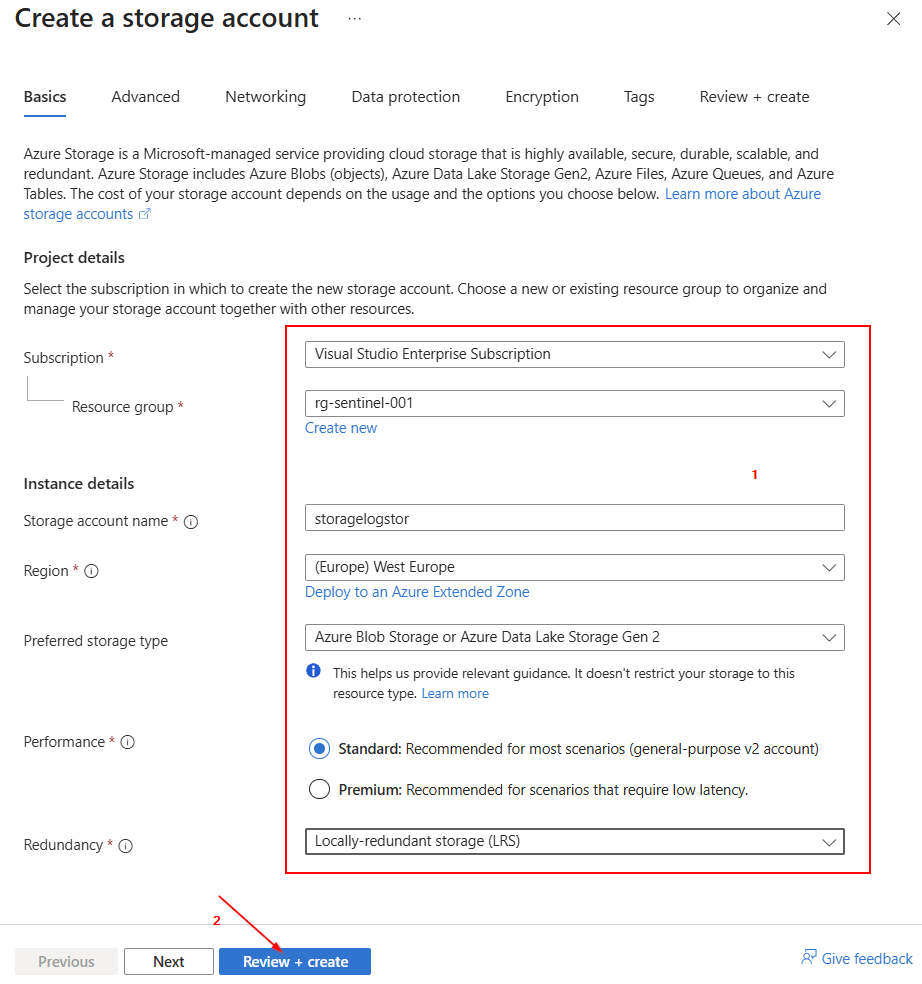
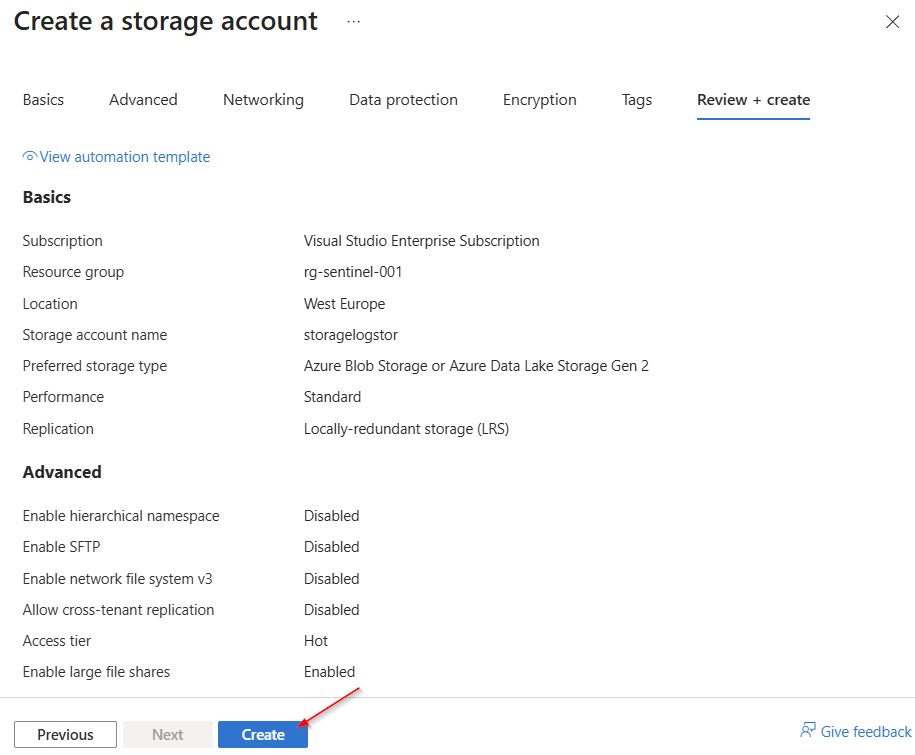
Fill in all the necessary fields, such as Subscription, Resource group, Storage account name, Region, Preferred storage type, Performance, and Redundancy. Then click on "Review + Create".
Click "Create" again.
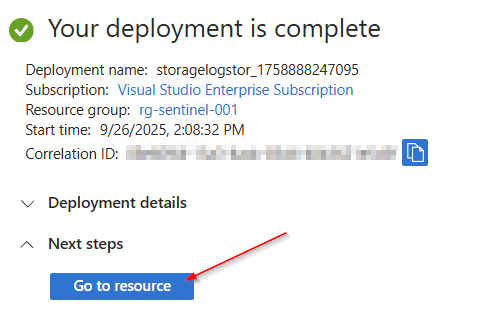
Once the deployment is complete, select “Go to resource.”
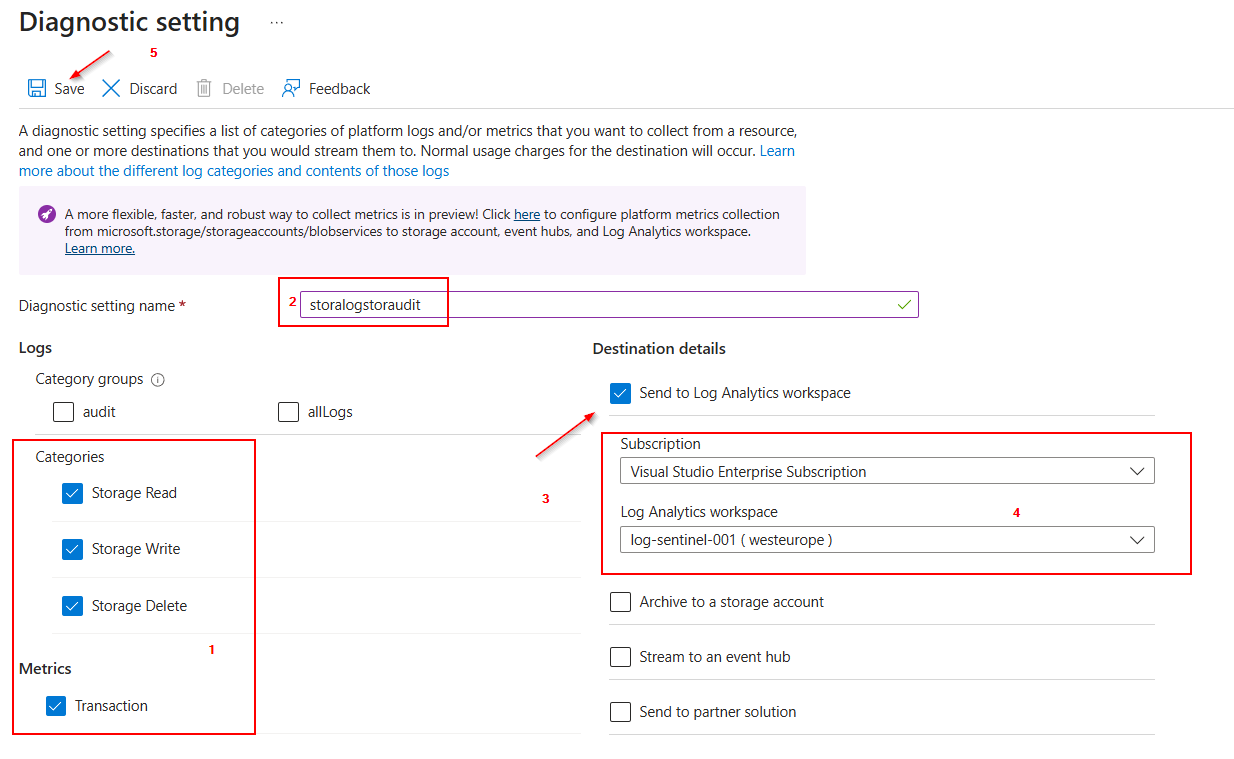
Next, select “Diagnostic settings” and choose the “blob” storage type for which the log data is to be collected.
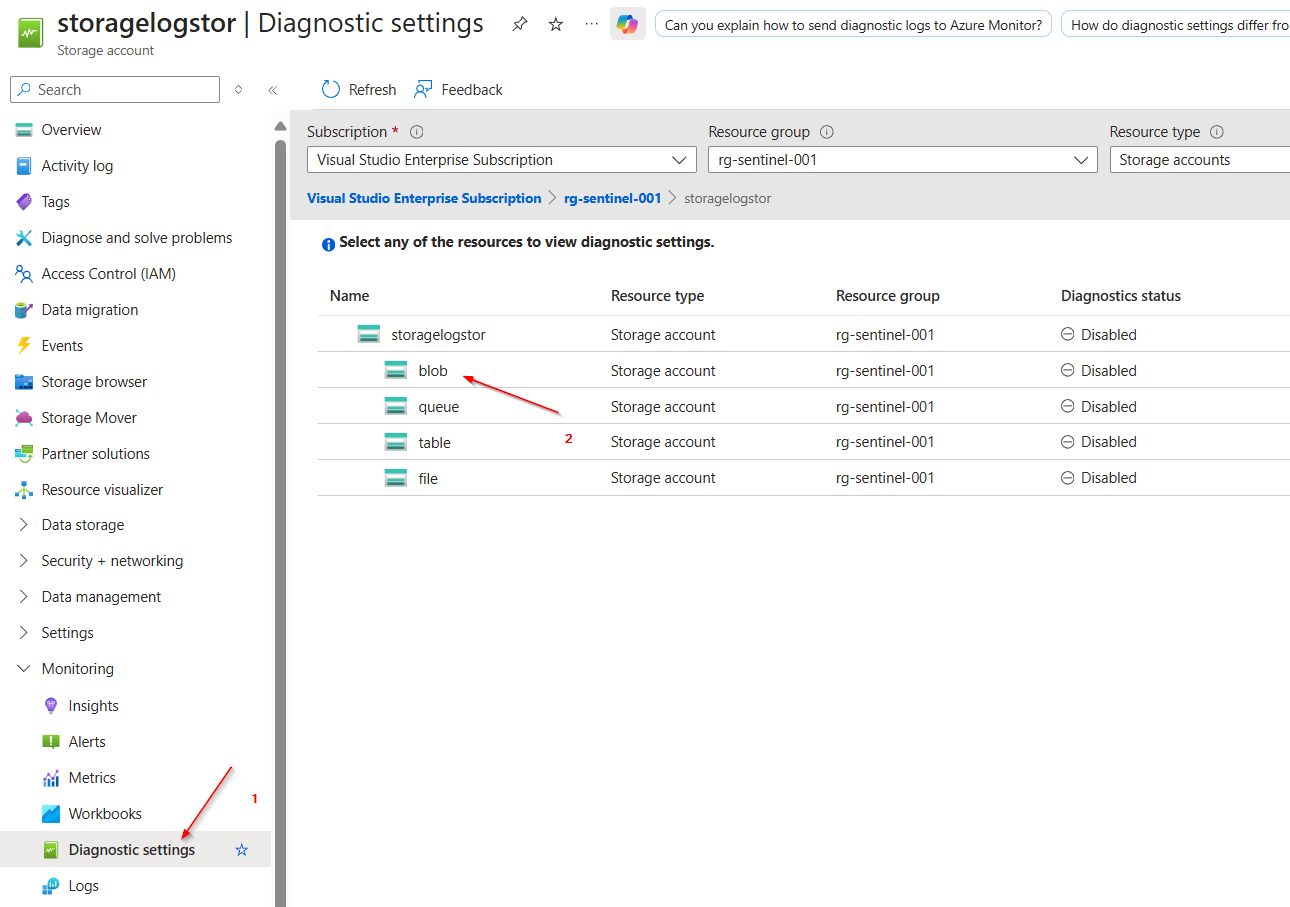
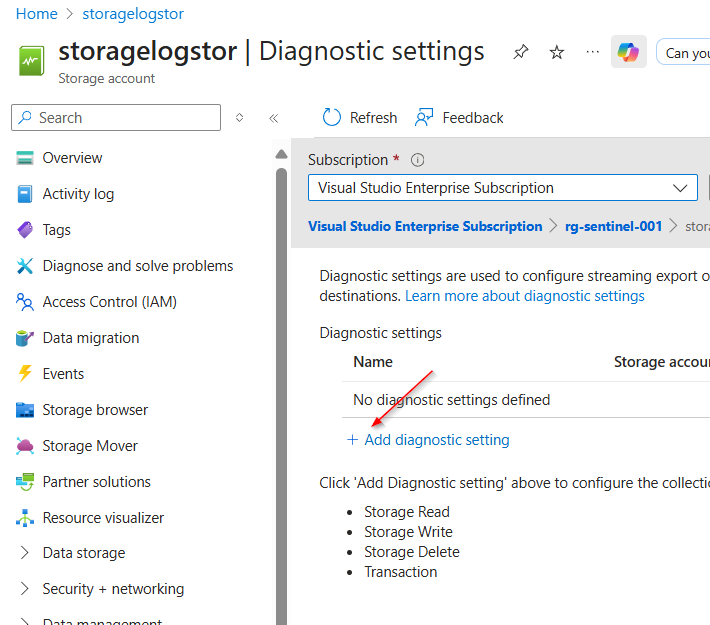
Select "Add diagnostic setting".
- Select the categories for which logging data should be collected.
- Assign a name for the Diagnostic Settings.
- Define a destination for the collected logs. In this case, select “Send to Log Analytic workspace.”
- Select the correct “Subscription” and “Log Analytic workspace.”
- Click on “Save.”


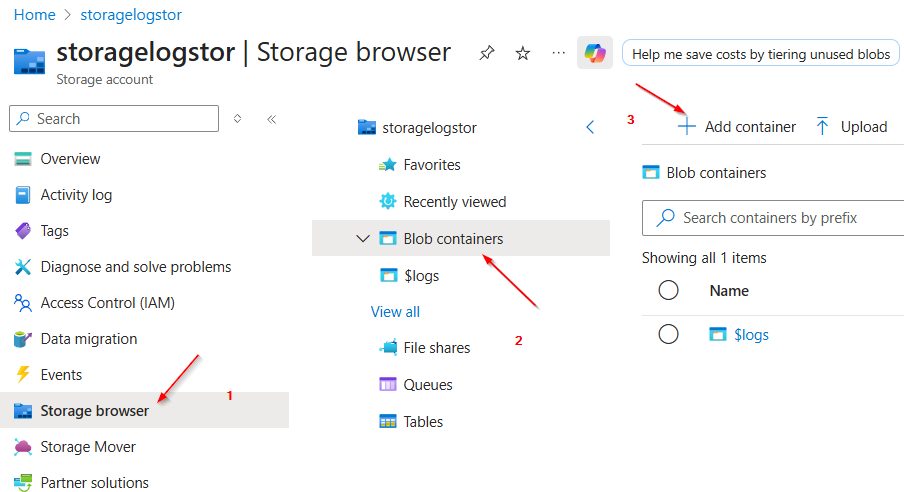
Next, you need to create a container and generate some logging data.
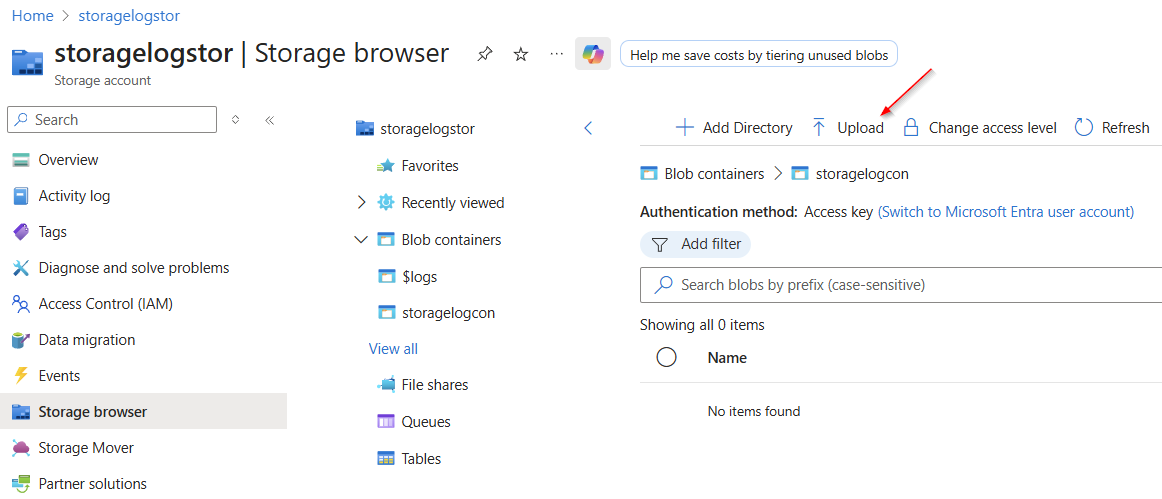
- To do this, go to “Storage browser.”
- Then click on “Blob containers.”
- Next, select “Add container.”
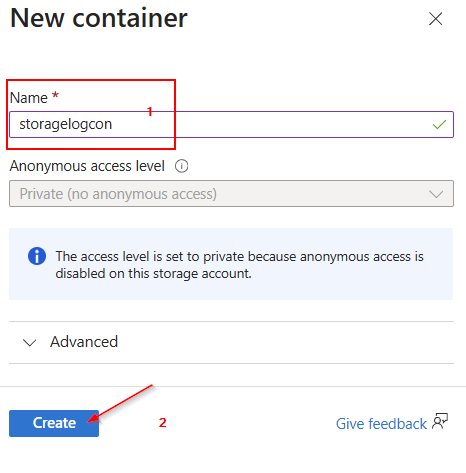
Now we assign a name to the new container and then click on “Create.”

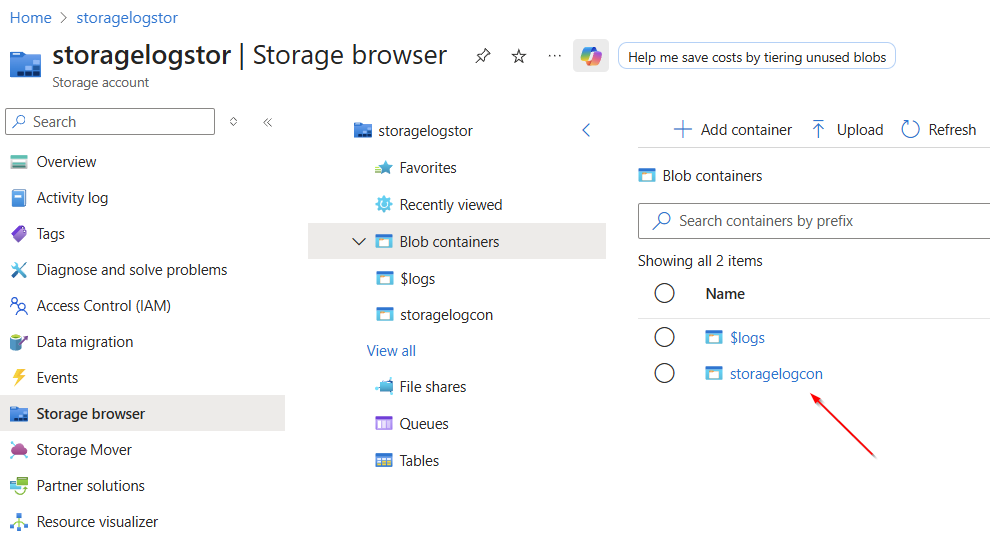
As soon as the new container is visible (you can refresh the view with F5), we select it.
Now let's click on “Upload”.
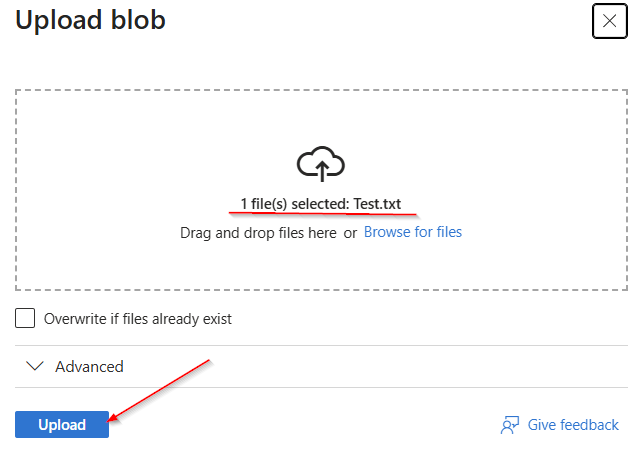
We move a file (in our case “Test.txt”) with any content into the drag and drop field and click on “Upload” again.
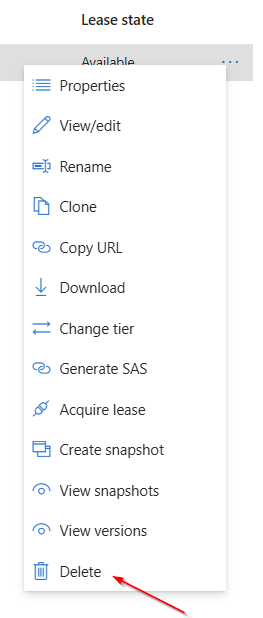
Once the upload is complete, we click on the 3 dots next to the new file.
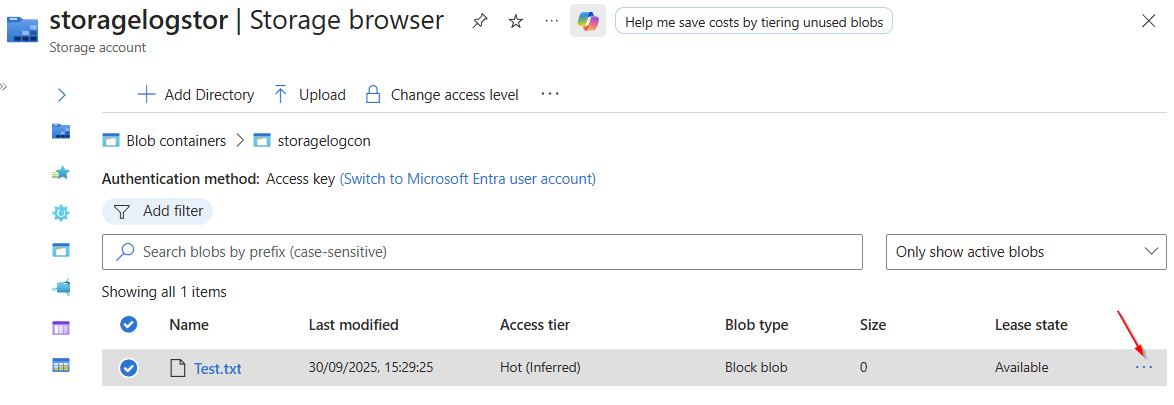
A menu opens, in which we select the "Delete" function.
Showing Result in the Log Analytic Workspace:
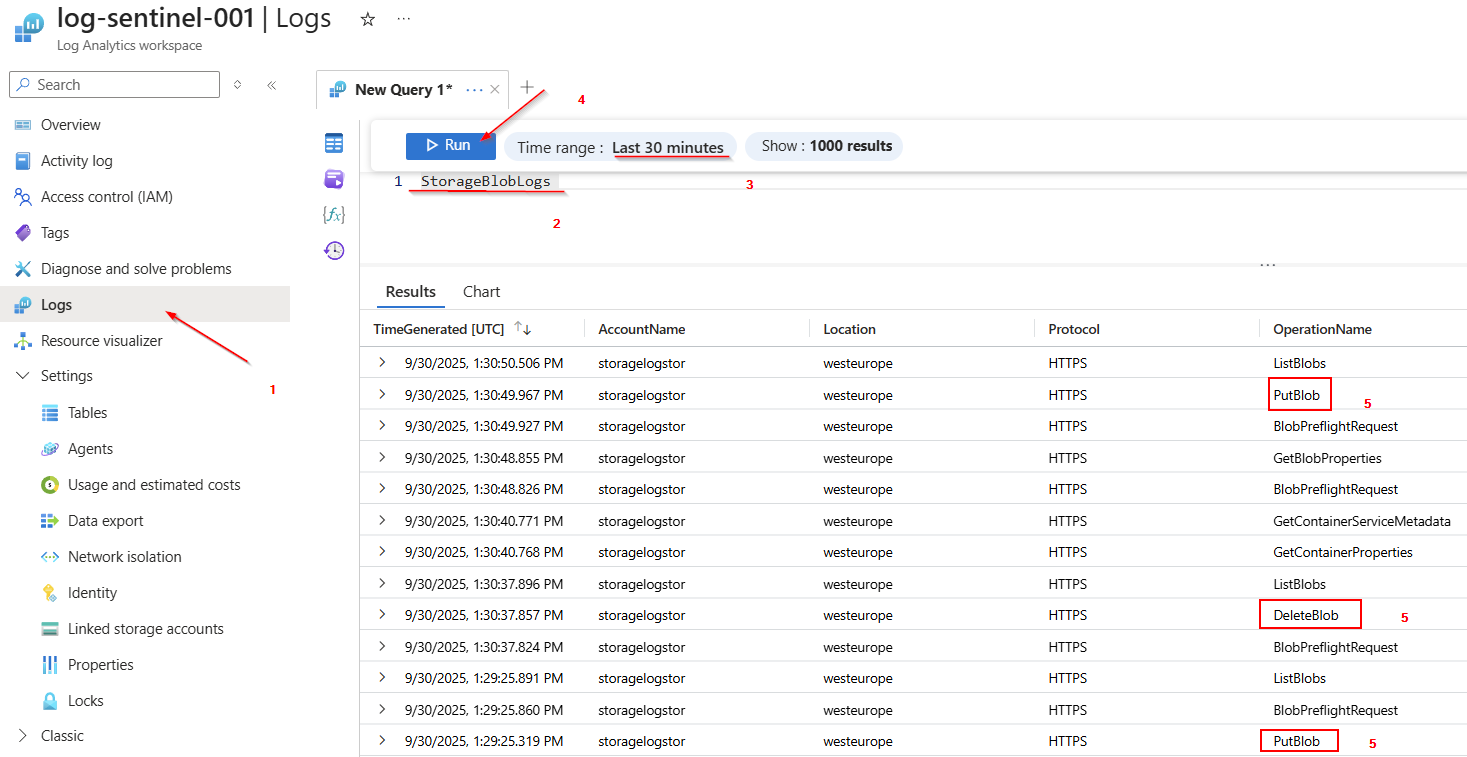
Now that we have added a few interactions to the storage account, we should check whether these have been logged. To do this, we switch to the Log Analytics workspace, click on “Logs”, and display all data from the “StorageBlobLogs” table.
To do this, you just need to specify the table name and click on "Run".
As you can see, a few interactions have already been logged
Creating an Auxiliary - Tier Table
To split the data into different tables, you need to create a destination table for this purpose. To do this, we use a ready-made script (the script can be found here). Save it with the name “Create-AuxCustomTable.ps1”.
function Create-AuxCustomTable{

<#

.SYNOPSIS
    Creates or updates an Auxiliary (Data Lake) custom table in Azure Log
    Analytics.

.DESCRIPTION
    This function allows you to create a new Auxiliary (Data Lake) custom
    Table in Azure Log Analytics or update an existing table
    by copying the schema of a specified source table.

.NOTES
    File Name : Create-AuxCustomTable.ps1
    Author    : Microsoft MVP/MCT - Charbel Nemnom
    Version   : 1.1
    Date      : 17-June-2025
    Updated   : 20-August-2025
    Requires  : PowerShell 7.4.x (Core)
    Module    : Az Module

.LINK
    To provide feedback or for further assistance please visit:
    https://charbelnemnom.com

.PARAMETER workspaceResourceId
    The resource id of the Log Analytics workspace.
    /subscriptions/subscription-Id/resourceGroups/rg-name/providers/Microsoft.OperationalInsights/workspaces/workspace-name

.PARAMETER SourceTableName
    The name of the source table to copy the schema from.

.PARAMETER AuxTableName
    The name of the new Auxiliary (Data Lake) custom table to create (suffix _CL will be appended automatically).

.PARAMETER AuxTableDescription
    A description for the new Auxiliary (Data Lake) custom table.

.PARAMETER TotalRetention
    Total long-term retention period for the new Auxiliary (Data Lake) table in days between (30-4383).

.EXAMPLE
    Create-AuxCustomTable `
     -WorkspaceResourceId "/subscriptions/00000000-0000-0000-0000-000000000000/resourceGroups/MyResourceGroup/providers/Microsoft.OperationalInsights/workspaces/MyWorkspace" `
     -SourceTableName "CommonSecurityLog" `
     -AuxTableName "AuxTable" `
     -AuxTableDescription "AuxTableDescription" `
     -TotalRetention 365
#>

param (
    [Parameter(Position = 0, Mandatory = $true, HelpMessage = 'Enter Log Analytics Workspace Resource Id')]
    [ValidateNotNullOrEmpty()]
    [string]$WorkspaceResourceId,

    [Parameter(Position = 1, Mandatory = $true, HelpMessage = 'Enter the source table Name')]
    [ValidateNotNullOrEmpty()]
    [string]$SourceTableName,

    [Parameter(Position = 2, Mandatory = $true, HelpMessage = 'Enter the Auxiliary (Data Lake) custom table Name')]
    [ValidateNotNullOrEmpty()]
    [string]$AuxTableName,

    [Parameter(Position = 3, Mandatory = $true, HelpMessage = 'Enter the description for the new Auxiliary (Data Lake) custom table')]
    [ValidateNotNullOrEmpty()]
    [string]$AuxTableDescription,

    [Parameter(Position = 4, Mandatory = $true, HelpMessage = 'Enter the total retention period for the Auxiliary (Data Lake) table in days between [30-4383]')]
    [ValidateRange(30, 4383)]
    [int]$TotalRetention
)

#! Define Variables
$tableType = "auxiliary"
#! Define the Preview API Version to use for Log Analytics
$apiVersion = "?api-version=2023-01-01-preview"

#! Install Az Module If Needed
function Install-Module-If-Needed {
    param([string]$ModuleName)

    if (Get-Module -ListAvailable -Name $ModuleName) {
        Write-Host "Module '$($ModuleName)' already exists, continue..." -ForegroundColor Green
    }
    else {
        Write-Host "Module '$($ModuleName)' does not exist, installing..." -ForegroundColor Yellow
        Install-Module $ModuleName -Force  -AllowClobber -ErrorAction Stop
        Write-Host "Module '$($ModuleName)' installed." -ForegroundColor Green
    }
}

#! Install Az Accounts Module If Needed
Install-Module-If-Needed Az.Accounts

#! Check Azure Connection
Try {
    Write-Verbose "Connecting to Azure Cloud..."
    Connect-AzAccount -WarningAction SilentlyContinue -ErrorAction Stop | Out-Null
}
Catch {
    Write-Warning "Cannot connect to Azure Cloud. Please check your credentials. Exiting!"
    Break
}

# Create the authentication token
$context = Get-AzContext
if (-not $context) {
    throw "No Azure context found. Please re-authenticate."
}
$tokenRequest = [Microsoft.Azure.Commands.Common.Authentication.AzureSession]::Instance.AuthenticationFactory.Authenticate($context.Account, $context.Environment, $context.Tenant.Id, $null, "Never", $null, "https://management.azure.com/")
if (-not $tokenRequest) {
    throw "Failed to obtain access token. Please check your authentication."
}
$AzureAccessToken = $tokenRequest.AccessToken
$AuthenticationHeader = New-Object "System.Collections.Generic.Dictionary[[String],[String]]"
$AuthenticationHeader.Add("Content-Type", "application/json")
$AuthenticationHeader.Add("Authorization", "Bearer $AzureAccessToken")

# Getting original source table schema
Write-Output "[Getting source table schema for $sourceTableName...]"
$tableManagementAPIUrl = "https://management.azure.com$workspaceResourceId/tables/$sourceTableName" + "$($apiVersion)"
$response = Invoke-RestMethod -Uri $tableManagementAPIUrl -Method Get -Headers $AuthenticationHeader -ErrorAction Stop
$columns = $response.properties.schema.columns

# For standard tables we need to look into standard and custom columns separately
if ($sourceTableName -notlike "*_CL") {
    $columns += $response.properties.schema.standardColumns
}

# Removing reserved column names from the schema
Write-Output "[Removing reserved column names from the schema...]"
$columnsNameToRemove = @("TenantId", "SourceSystem")
# Removing dynamic column type from the schema. Tables with the Auxiliary plan don't support columns with dynamic data.
Write-Output "[Removing dynamic column type from the schema...]"
$columnsTypeToRemove = @("dynamic")
$updatedColumns = $columns | Where-Object { $columnsNameToRemove -notcontains $_.name -and $columnsTypeToRemove -notcontains $_.type }

# Construct table parameters
Write-Output "[Constructing the Auxiliary table parameters...]"
$customAuxTableName = $auxTableName + "_CL"
$TableParams = @{
    properties = @{
        schema               = @{
            name        = $customAuxTableName
            description = $auxTableDescription
            columns     = $updatedColumns
        }
        totalRetentionInDays = $TotalRetention
        plan                 = $tableType
    }
}

# Convert table parameters to JSON
Write-Output "[Converting table parameters to JSON...]"
$TableParamsJson = $TableParams | ConvertTo-Json -Depth 4

# Create or update the table
Write-Output "[Creating/Updating Auxiliary table $customAuxTableName...]"
$Response = Invoke-AzRestMethod -Path "$workspaceResourceId/tables/${customAuxTableName}$($apiVersion)" -Method PUT -Payload $TableParamsJson

if ($Response.StatusCode -eq 200 -or $Response.StatusCode -eq 202) {
    Write-Output "[Success] Auxiliary Table '$customAuxTableName' created/updated successfully."
}
else {
    Write-Error "Failed to create/update the table. Status code: $($Response.StatusCode)"
    if ($Response.Content) {
        $ErrorDetails = $Response.Content | ConvertFrom-Json
        Write-Error "Error Code: $($ErrorDetails.error.code)"
        Write-Error "Error Message: $($ErrorDetails.error.message)"
    }
}
}
It is best to run it in an Azure Shell and upload the script via “Manage files.” Once uploaded, you need to dot source it.
With the command
Create-AuxCustomTable `
         -WorkspaceResourceId "/subscriptions/45dc4629-f423-4e3c-a063-37b62eec82fb/resourcegroups/rg-sentinel-001/providers/microsoft.operationalinsights/workspaces/log-sentinel-001" `
         -SourceTableName "StorageBlobLogs" `
         -AuxTableName "StorageBlobLogs_Aux" `
         -AuxTableDescription "Test" `
         -TotalRetention 365
we create a so-called custom table in the auxiliary logs tier based on a template table and define the name of the source and what the new table should be called, as well as how long it should store data. The WorkspaceResourceId determines which Log Analytic workspace should be used.

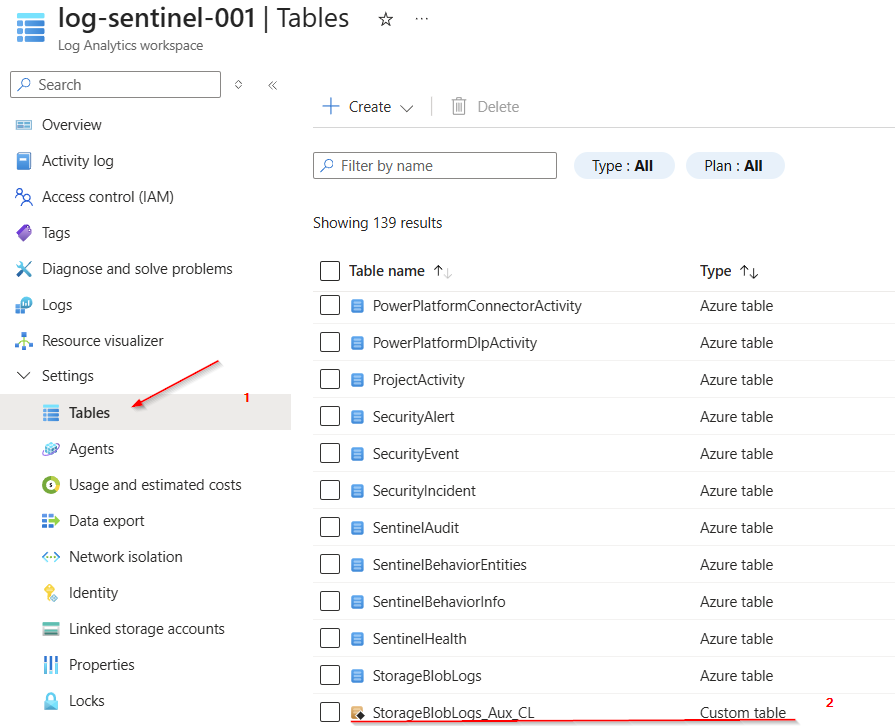
To view the new table, navigate to "Tables" under "Settings" in the Log Analytics workspace and search for the name of the newly created table.
The table can be easily identified because it has a “_CL” postfix.
Next, it is necessary to create or define the splitting logic.
In our case, we use a Workspace Transformation Rule for this.
Sometimes this rule already exists.
To check if you have a Workspace Transformation Rule in place, look for the kind parameter in the arm template of the rule you are checking.
To create a Workspace Transformation DCR via GUI follow the steps outlined here: Tutorial: Add a workspace transformation to Azure Monitor Logs by using the Azure portal - Azure Monitor | Microsoft Learn
We now assume that this DCR already exists and want to adapt it to our needs.
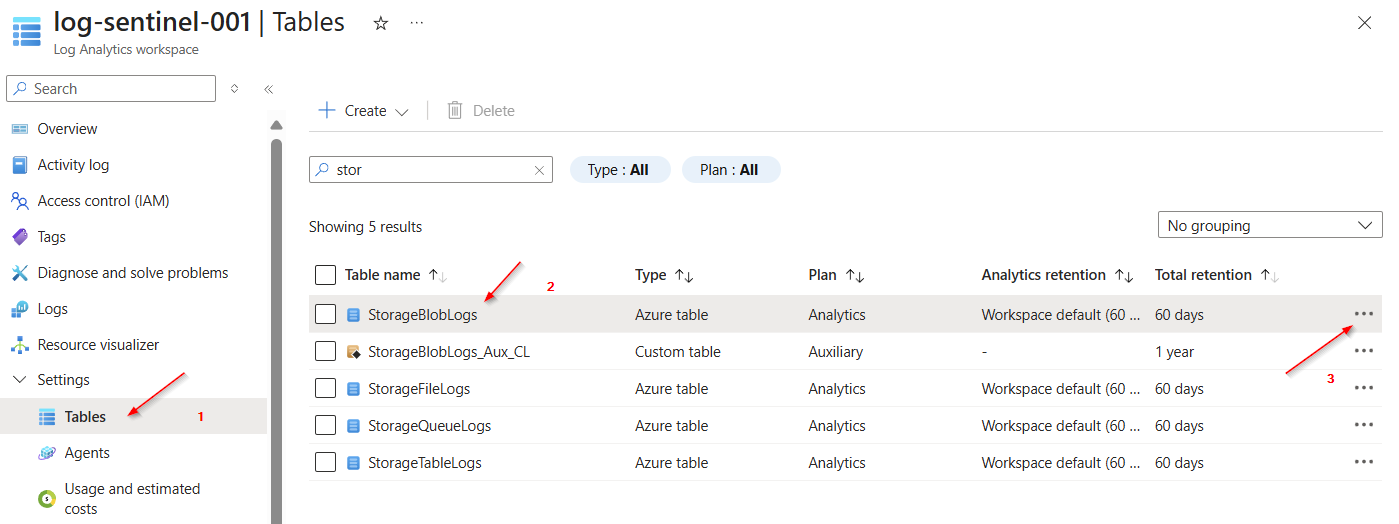
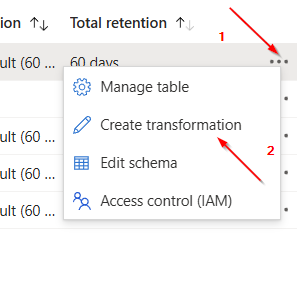
We navigate back to the “Tables” section under ‘Settings’ in the Log Analytics workspace and locate the “StorageBlobsLogs” table. Then we click on the three dots.
A menu will open. Select “Create transformation.”
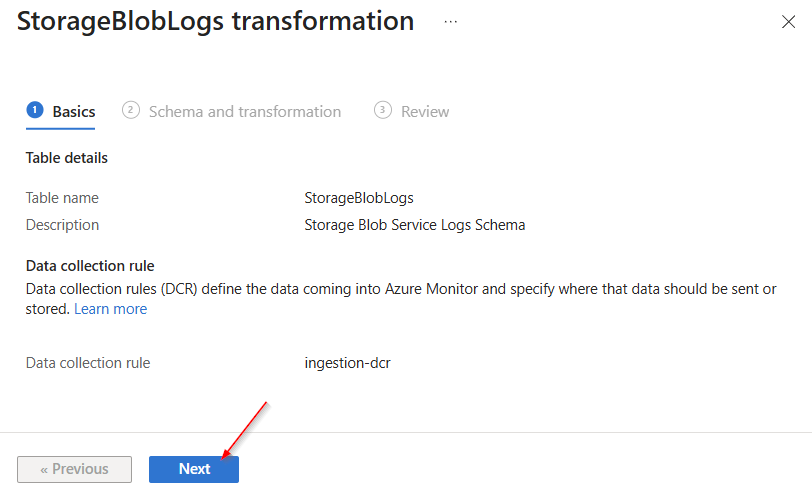
Click on "Next"
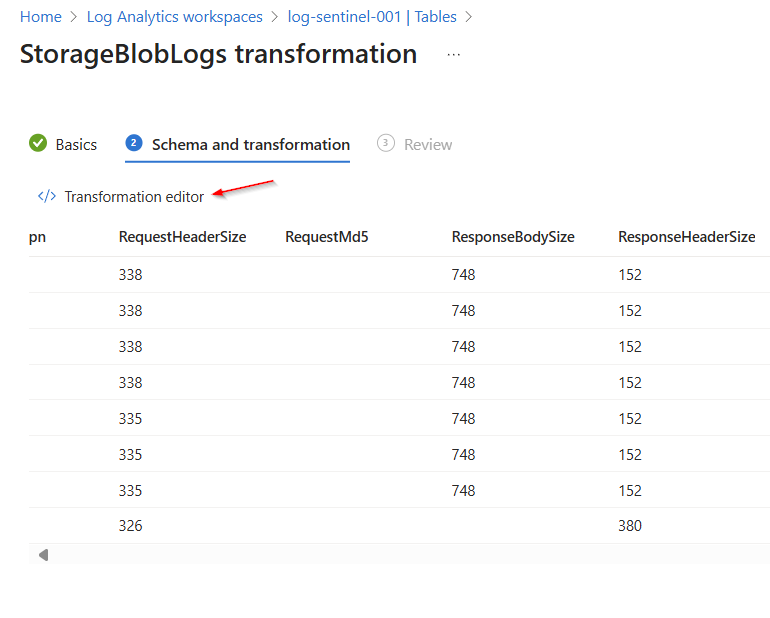
Select the icon for the "Transformation editor"
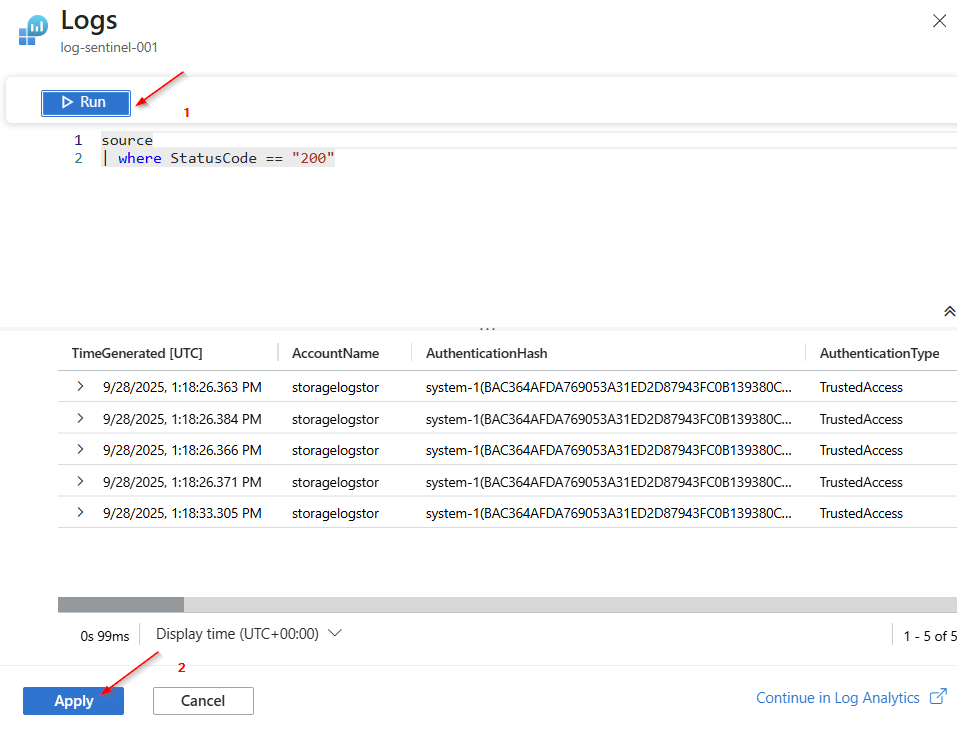
Add this Transformation (KQL)
source | where StatusCode == "200"Click on “Run” and confirm with “Apply”.
Click "Next" and "Create"
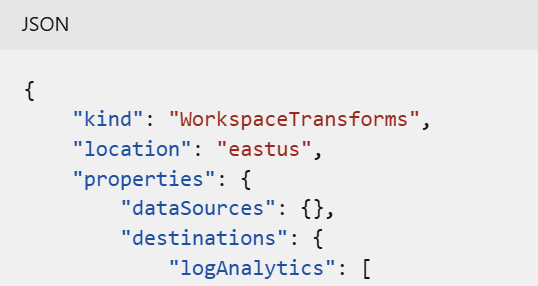
To see the result, you need to inspect the ARM code (JSON) of the Workspace DCR. Here you can see that the KQL transformation has been implemented.
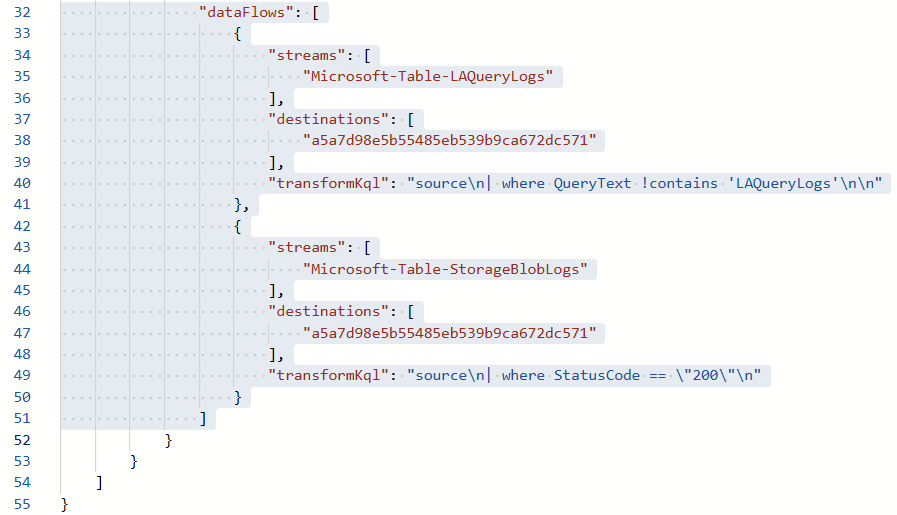
Since the redirection to another table is still missing here, the ARM template must be adapted for this and the workspace transformation DCR must be redeployed.
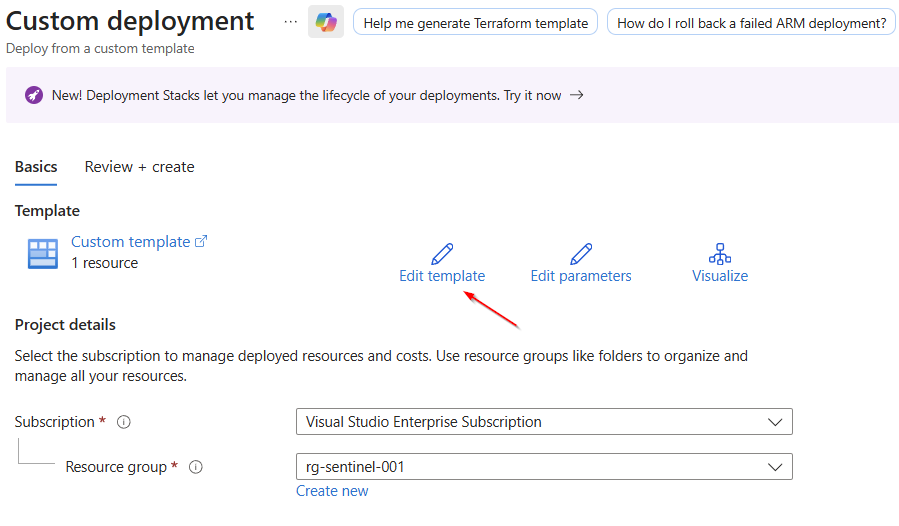
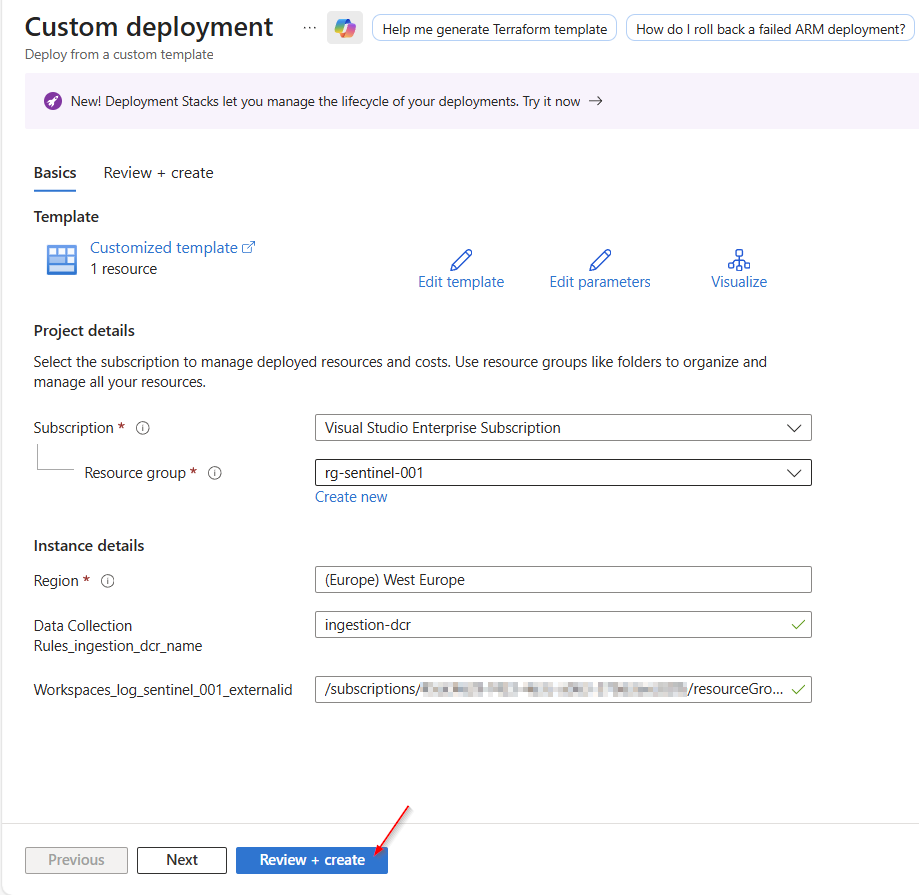
Select “Deploy”.

Navigate to "Edit template" and select it.
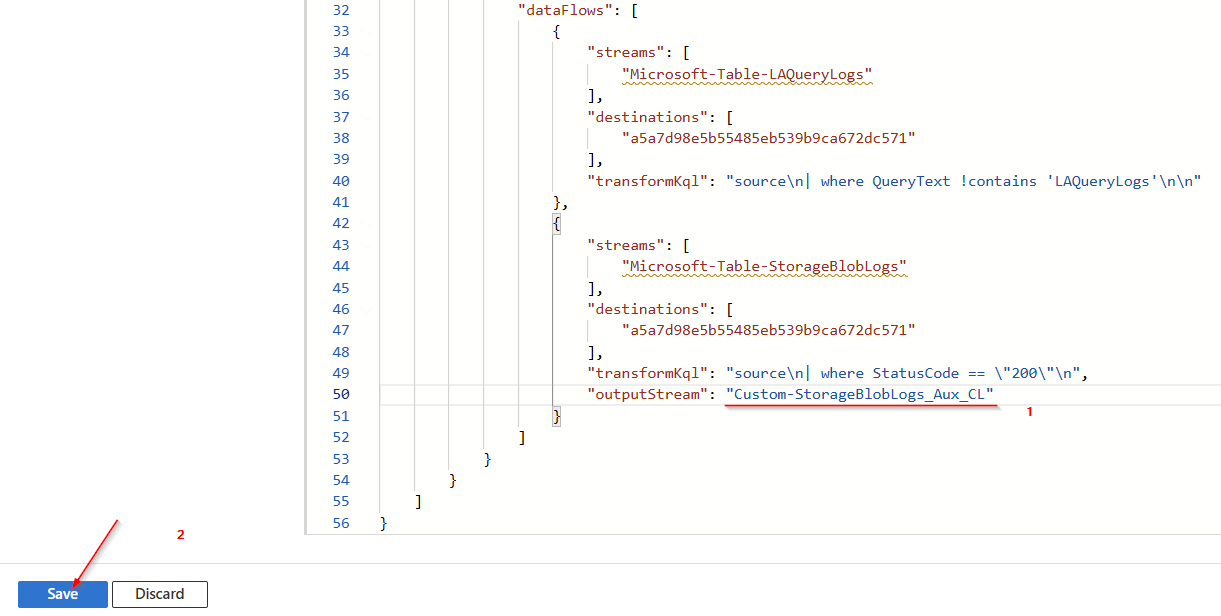
Add this line at the end of the template.
Make sure to use the prefix “Custom-“.
"outputStream": "Custom-StorageBlobLogs_Aux_CL"Select “Save”
Click on "Review + create"
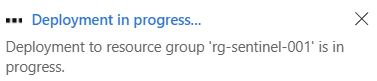
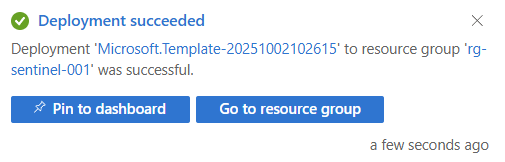
After about 30 minutes and further interaction with the storage account (e.g., copy and delete actions), the redirected logs should be in the newly created table.
Switch to the Log Analytics workspace, click on “Logs”, and display all data from the “StorageBlobLogs_Aux_CL” table.
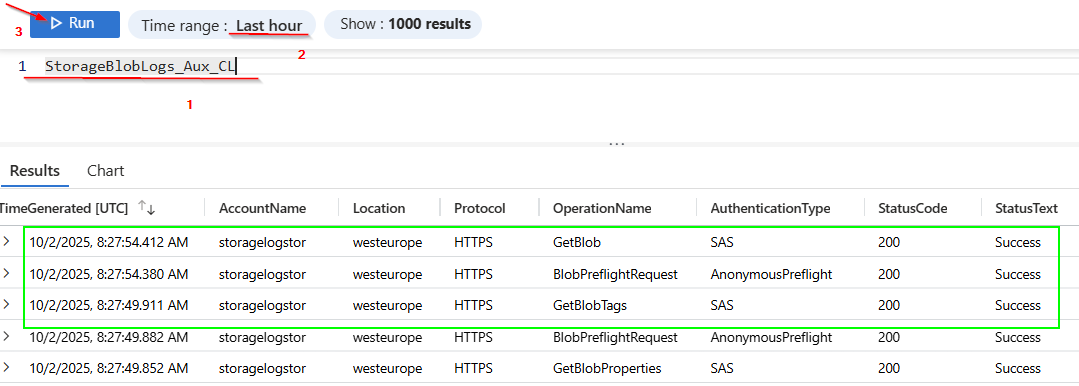
This way, logging information can be transferred to another storage location and stored more cost-effectively.
Sources:
