

This article has not been completed yet. However, it may already contain helpful Information and therefore it has been published at this stage.
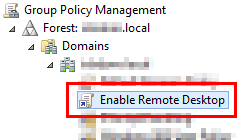
- Open up Group Policy Management Console (GPMC).
- Create a New Group Policy Object and name it Enable Remote Desktop.
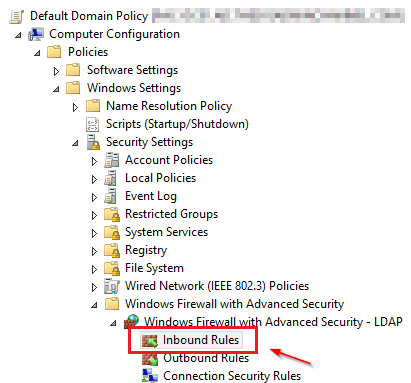
- Navigate to: Computer Configuration -> Windows Settings -> Security Settings -> Windows Firewall with Advanced Security -> Windows Firewall with Advanced Security -> Inbound Rules and Create a New Rule.
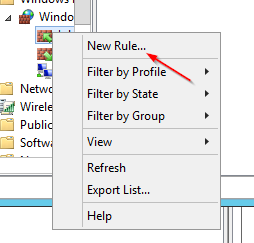
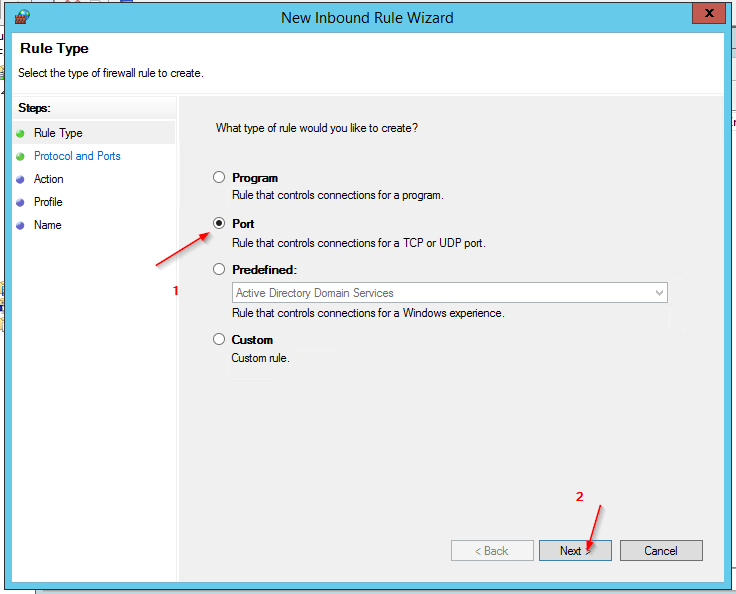
- Select Port in the New Inbound Rule Wizard.
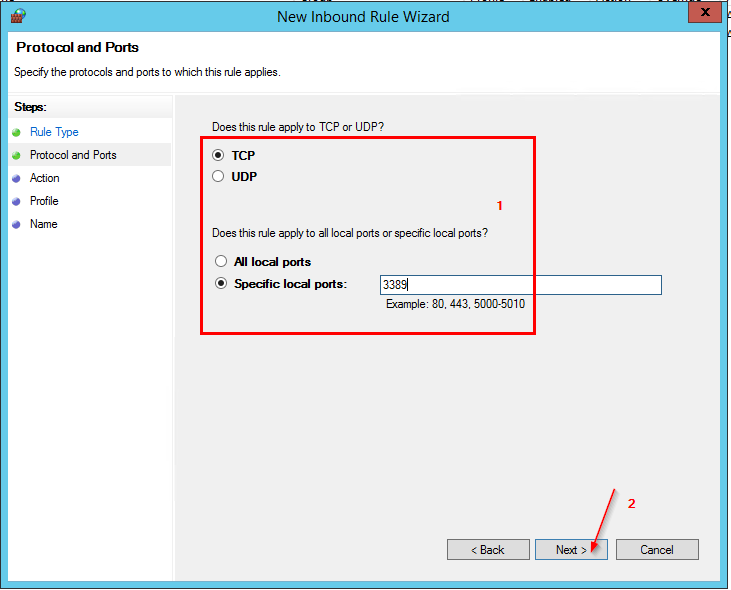
- Ensure TCP and Specific Local Port : 3389
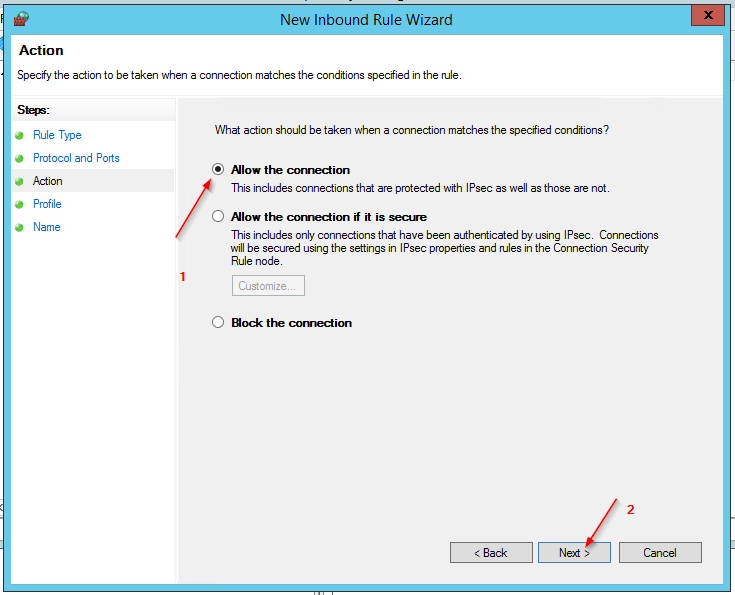
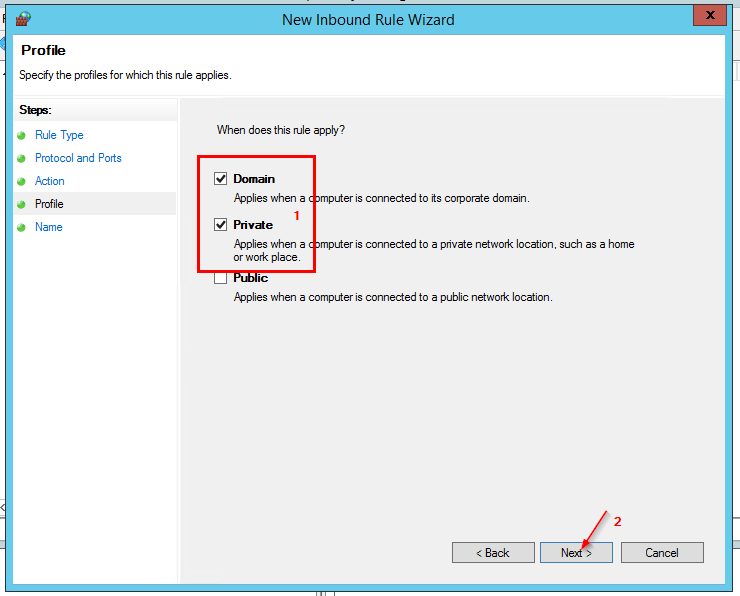
- Allow the Connection and only select Domain and Private Profiles.
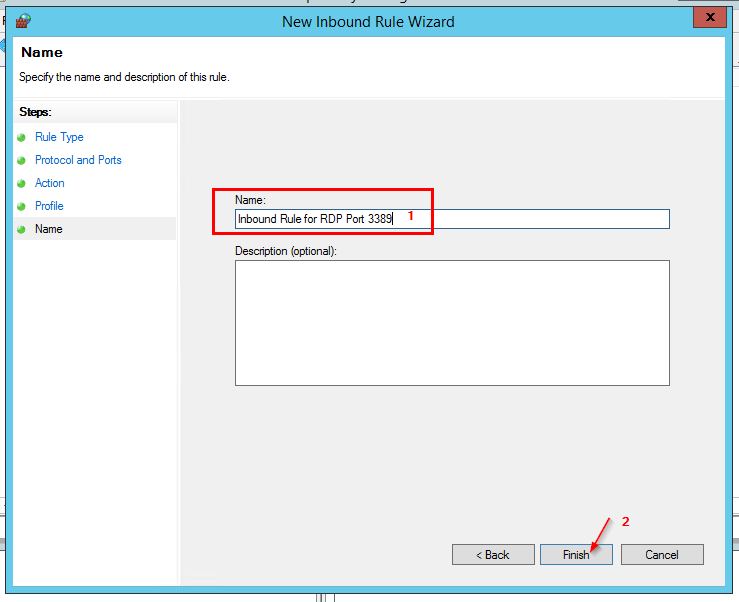
- Name this rule – Inbound Rule for RDP Port 3389
Now that we have added the local ports, we’ll need to enable the Remote Desktop Session Host policies.
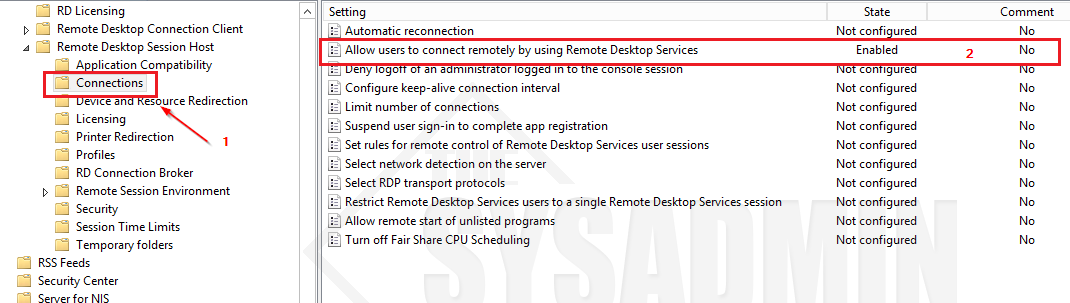
- Go to Computer Configuration -> Policies -> Administrative Templates -> Windows Components -> Remote Desktop Services -> Remote Desktop Session Host -> Connections
- Allow users to connect remotely by using Remote Desktop Services to Enable.
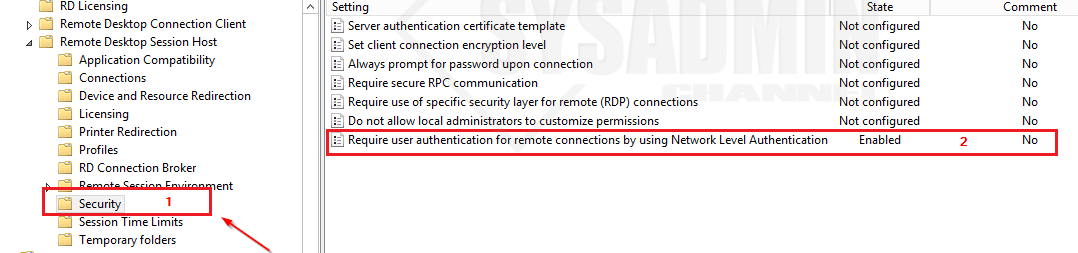
- Now we’re going to enable Network Level Authentication. This is highly recommended and has many security advantages.
- Go to Computer Configuration -> Policies -> Administrative Templates -> Windows Components -> Remote Desktop Services -> Remote Desktop Session Host -> Security
- Set Require user authentication for remote connections by using Network Level Authentication to Enable.
- Last we need to apply the newly created GPO to an Organizational Unit. For my own particular scenario, I set up the GPO at the top level, since I want to be able to access all devices remotely.

Sources: