
Lab files:
• azuredeploy.json
• azuredeploy.parameters.json
• install_iis_vmss.zip
Download: Lab1.zip
Objectives:
After completing this lab, you will be able to:
- Deploy Azure VMs via
- Azure portal
- Azure PowerShell
- Azure Resource Manager (ARM) templates
- Configure networking settings of Azure VMs
- Deploy and configure Azure VM scale sets
Task 1:
Deploy an Azure VM running Windows Server 2019 Datacenter into an availability set by using the Azure portal
- Start a browser of your choice
- Browse to the Azure portal (Link)
- Sign in (by using an account that is member of the Owner role in the Azure subscription you intend to use)
- Navigate to the "Marketplace"
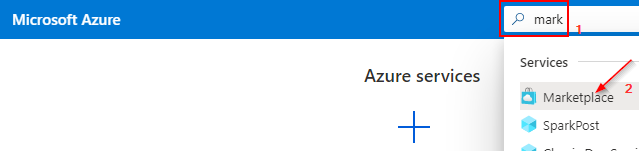
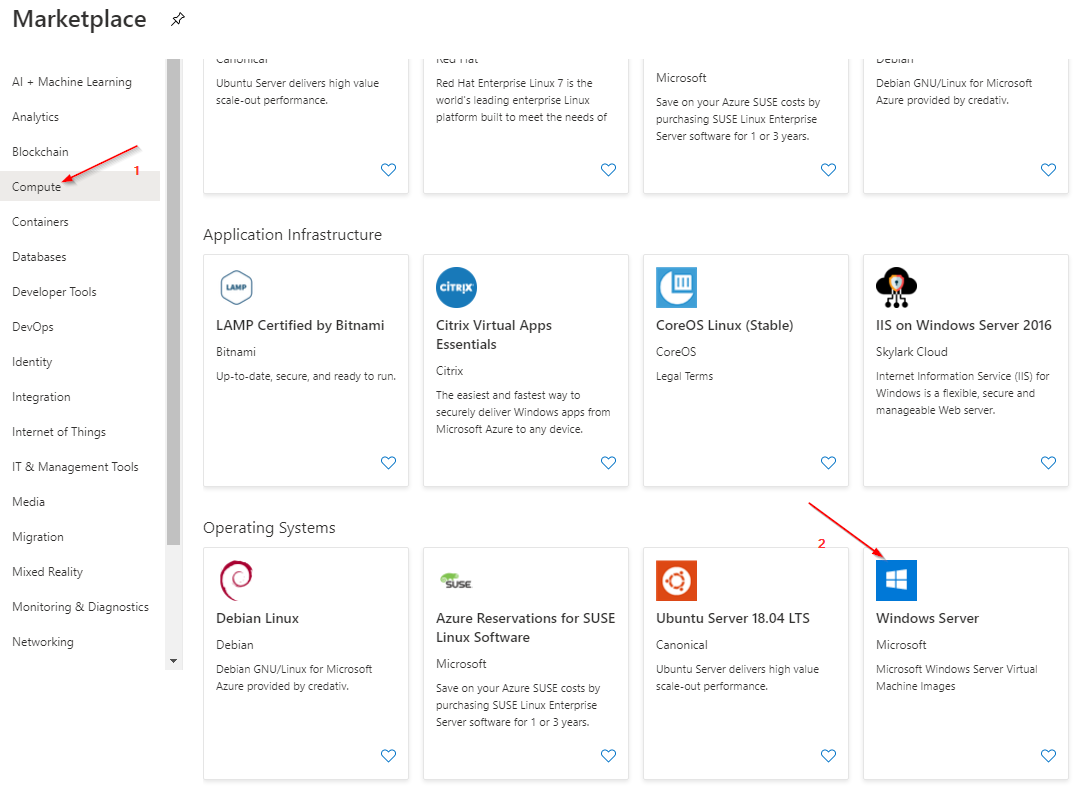
- Search the Marketplace for "Windows Server"
- Select Windows Server
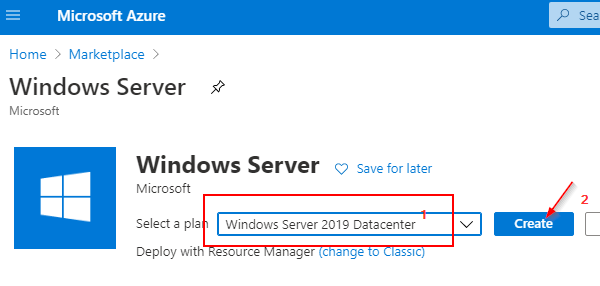
- On the Windows Server page, use the drop-down menu to select "Windows Server 2019 Datacenter", and then click "Create"
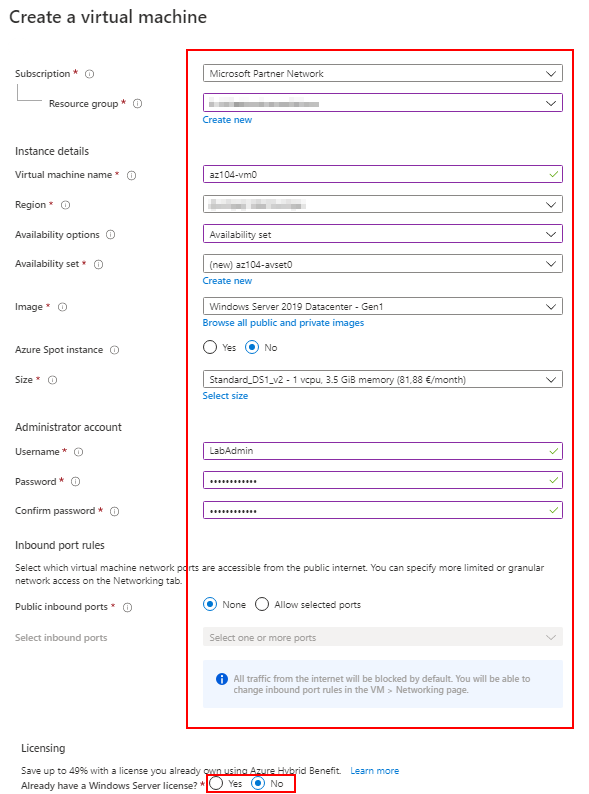
- Use following settings on the VM deployment blade:
- Basics:
- Subscription: Choose the subscription you are using for this lab
- Resource group: Create a new group or choose an existing one
- Virtual machine name: e.g. "az104-vm0"
- Region: Choose any region (the best match would be a close one)
- Availability options: Availability set (create new)
- Name: e.g. "az104-avset0"
- Fault domains: 2
- Update domains: 5
- Image: Windows Server 2019 Datacenter - Gen1
- Azure Spot Instance: No
- Size: Standard_DS1_v2
- Username: e.g. "LabAdmin"
- Password:****** (free choice)
- Public inbound ports: None
- Already have a Windows Server license?: No
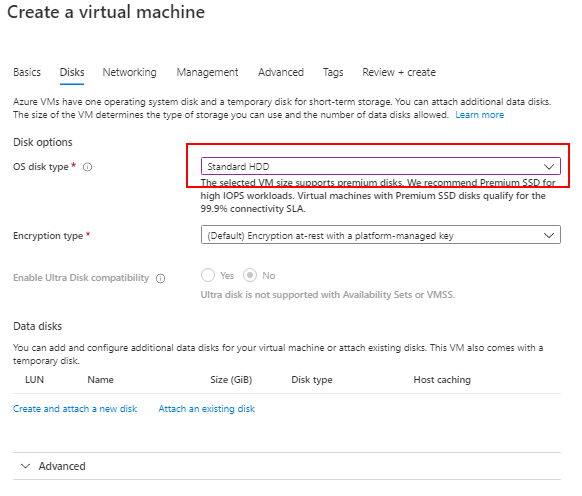
- Disks:
- OS disk type: Standard HDD
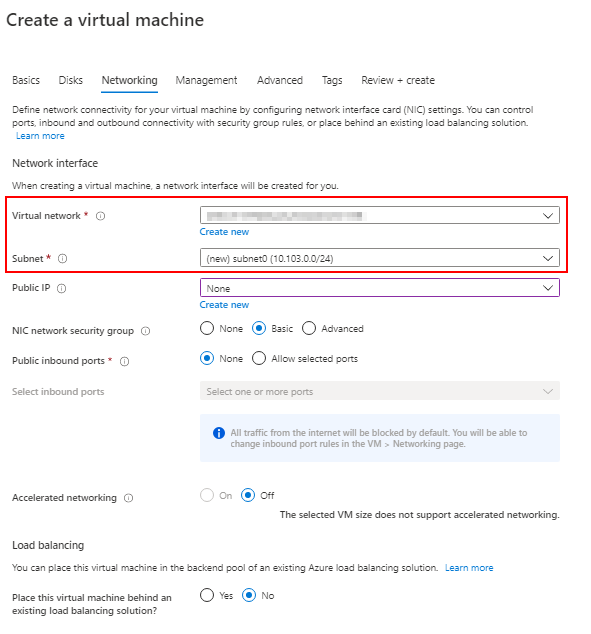
- Networking:
- Name: Leave the default
- Virtual network address range: 10.103.0.0/16
- Subnet name: subnet0
- Subnet address range: 10.103.0.0/24
- Management:
- Boot diagnostics: Off
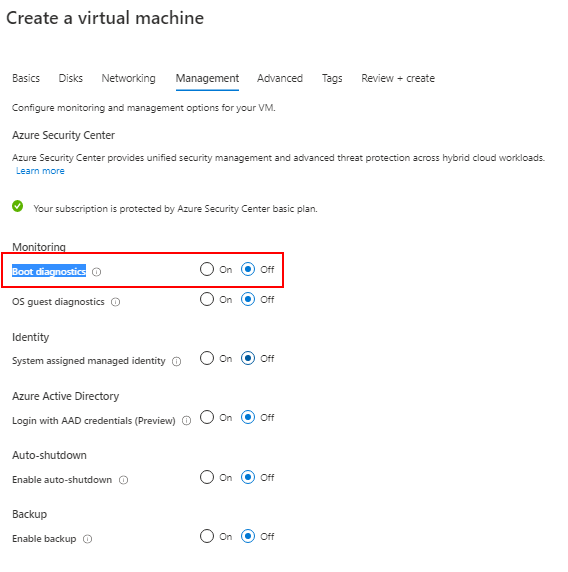
- Leave all other settings with their default values
- Click Review + create.
- Create the VM
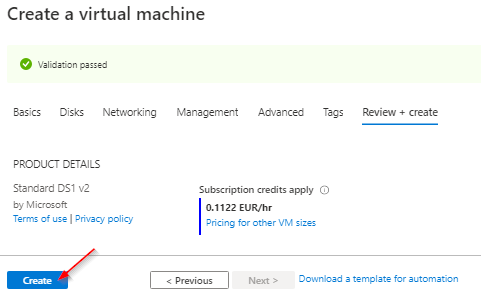
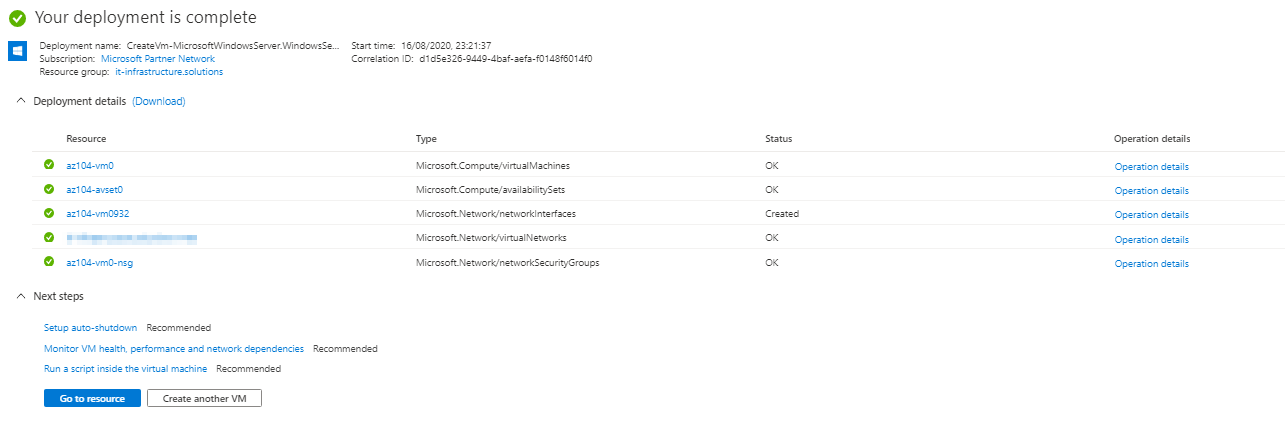
Wait for the deployment to complete before you proceed to the next task.
Continue to Task 2