
The following steps were taken with the help of Powershell and the associated modules (Exchange).
In the first part of this series I showed you how to display the mail history of the last 2 days (Exchange & Exchange online).
See link below: Link
As a side effect, the IP addresses used to distribute the spam messages can be determined.
Exhange online:
How to retrieve the relevant settings of the default filter-settings:
Get-HostedConnectionFilterPolicy -Identity Default |
Format-Table Name, IP*

# Source: https://4sysops.com/archives/configure-spam-filter-in-exchange-online-protection-eop-using-powershell/
How to modify the default filter-seetings without lossing the current state:
Set-HostedConnectionFilterPolicy -Identity Default -IPAllowList @{Add="192.168.1.11", "192.168.1.12", "172.16.1.0/24"; Remove="192.168.2.0/24"}

# To To keep the existing entries using "Add" or "Remove" is mandatory

# Source: https://4sysops.com/archives/configure-spam-filter-in-exchange-online-protection-eop-using-powershell/
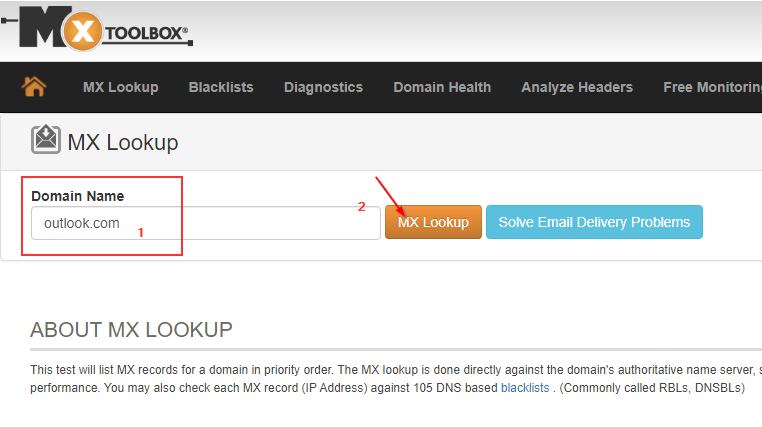
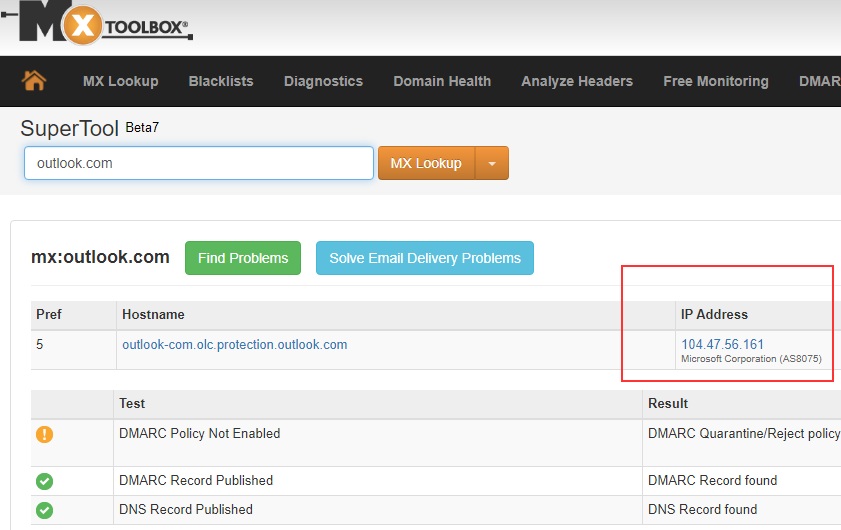
If you could only find out the domain of the spam sender, you can use one of the many free DNS services to find out the matching IP address.
One of the most popular providers here is probably mxtoolbox.
Link: https://mxtoolbox.com/
How to modify the default filter-seetings to block ip's:
Set-HostedConnectionFilterPolicy "Default" -IPBlockList @{Add="104.47.56.161","192.169.3.0/24","192.168.4.1-192.168.4.5";Remove="192.168.1.10"}

# Source: https://docs.microsoft.com/en-us/powershell/module/exchange/set-hostedconnectionfilterpolicy?view=exchange-ps
Having taken the most important steps to stop a spam attack, it is time to consider other possibly more sustainable methods to avoid spam.
Therefore, if you are interested, please consult part 3 of my series...