
Log in into the vSphere Web Client.
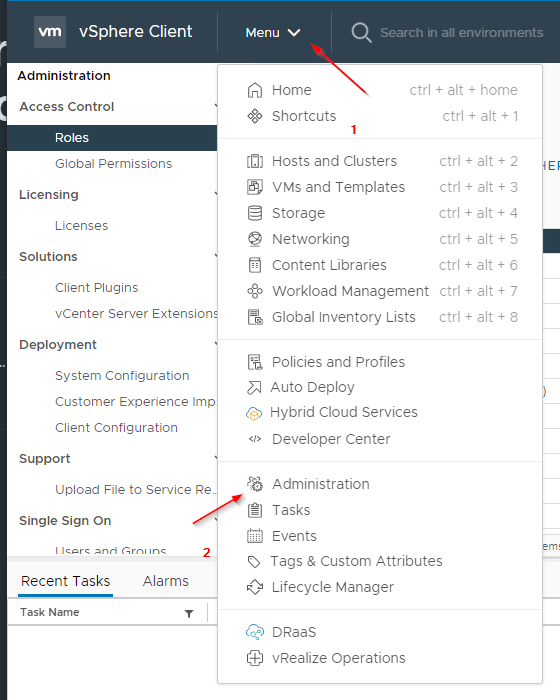
Select "Menu" and then "Administration".
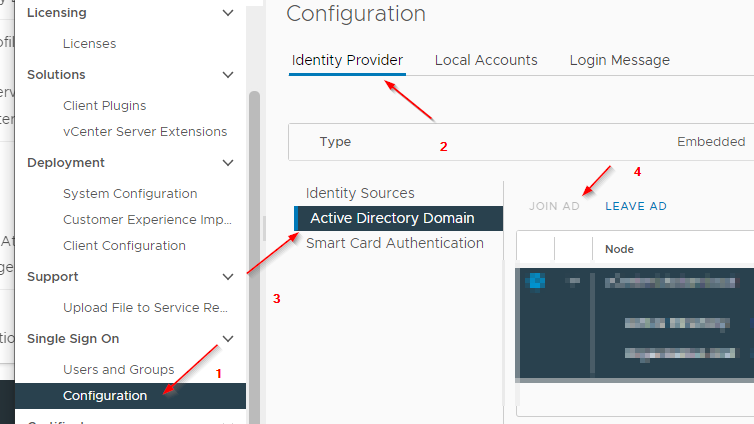
Look for "Configuration", select "Identity Provider", "Active Directory Domain" and click on "Join AD".
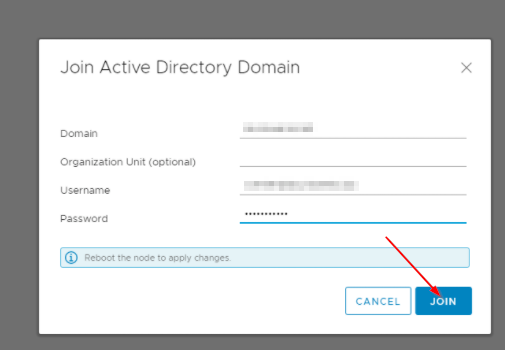
Fill in all the necessary fields in the form to join the domain.
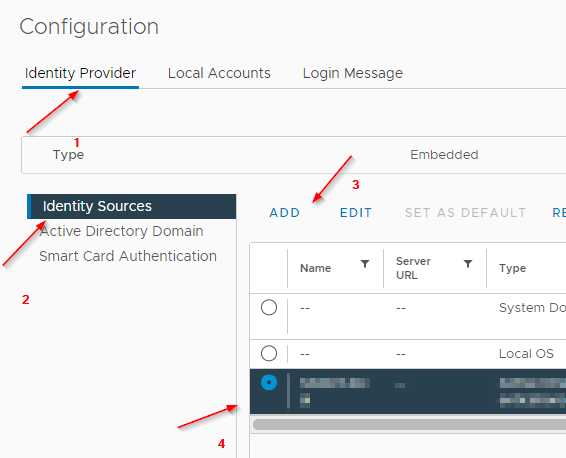
Reboot the vCenter Server Appliance for any changes to take effect. After reboot, navigate back to the "Single Sign-On" Configuration section. Choose "Identity provider" and click "Identity Sources". Here, add the domain you configured in the previous step.
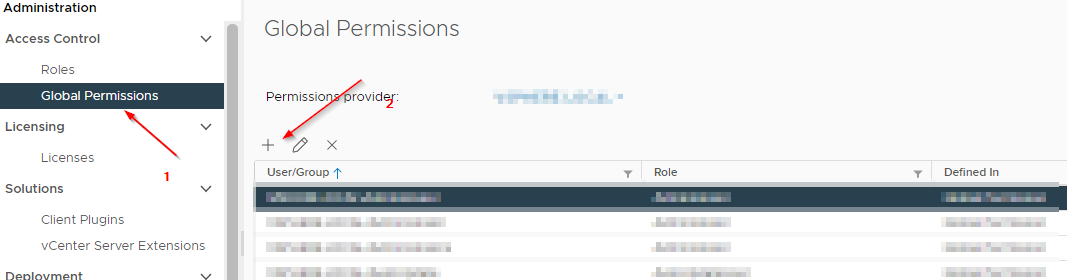
Then, assign permissions to the accounts you manage or access in the infrastructure. Navigate to the "Global Permissions" section in vCenter Server and click the "Global Permissions" button to add authorized users and accounts. Choose carefully which users you grant access, as well as the privileges they'll have.
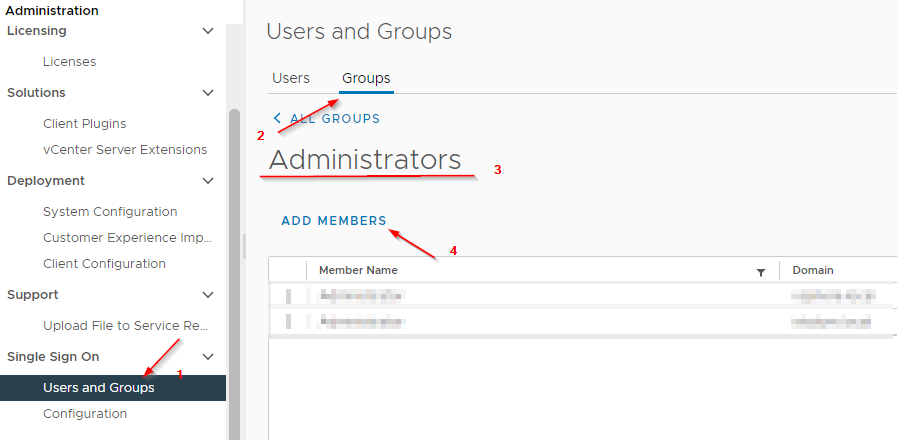
Another way to assign the needed privileges is to use the predefined roles and groups. In my eyes, this is the better approach.
To do this, navigate back to the "Single Sign On" section. The necessary assignments can then be made under "Users and Groups".
You should then be able to log in successfully with your respective AD user.
Source:

