
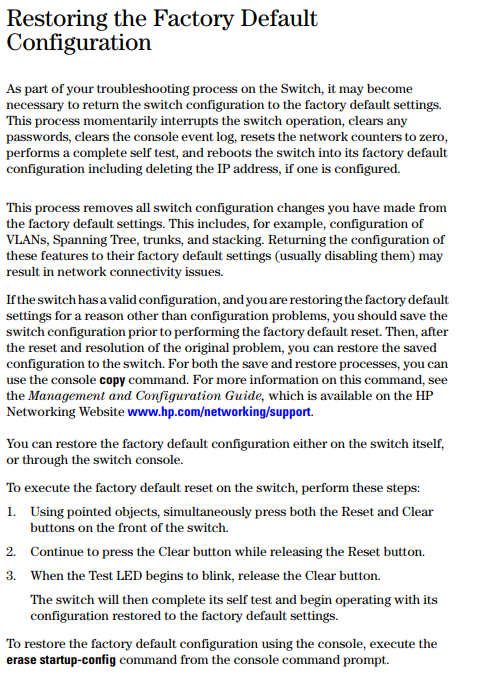
- Press in both the Clear and Reset buttons (tiny buttons on the left edge)

- Release the Reset button after the port lights come on (~2 seconds)
- When the Self-Test LED starts flashing (to the left of the Clear and Reset buttons), release the Clear button.
This resets the switch to the factory default settings, including the IP address. By default this switch uses DHCP for its IP if available;
Official Instructions:
Connection and Configuration:
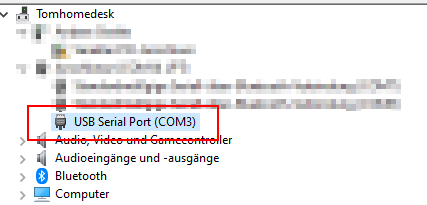
Used USB-Device:
DIGITUS USB2.0 Seriell-Adapter
USB 2.0 zu seriell Konverter, DSUB 9M inkl. USB A Kabel 80cm, FTDI Chipsatz
 Produkte
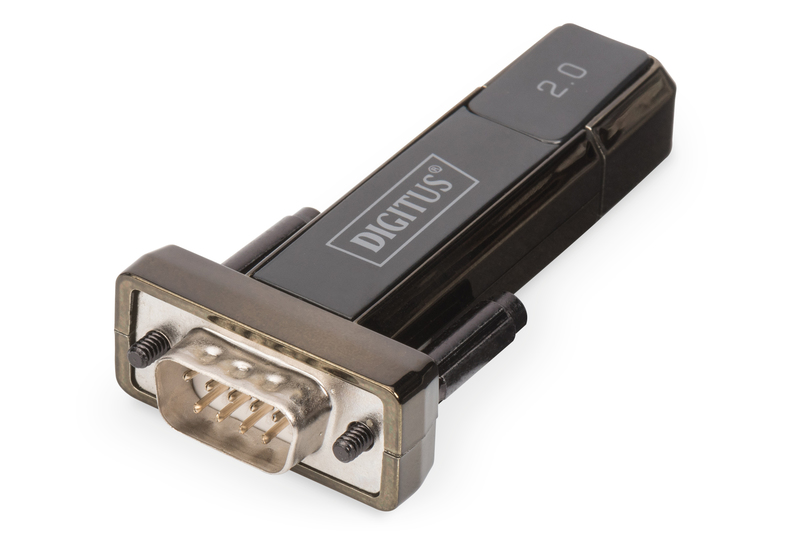
- Download Driver...
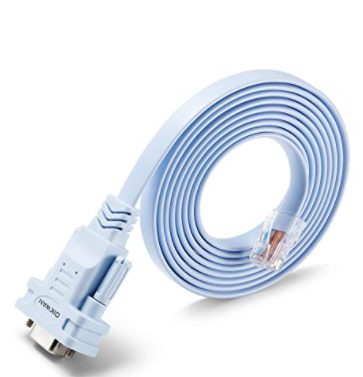
Used Cable:
Cisco Rollover Cable
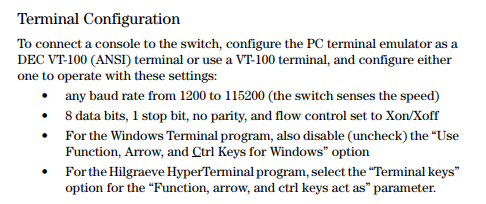
Needed Communication Config:
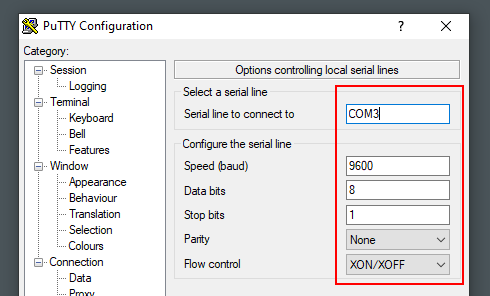
Used Putty configuration:
https://www.putty.org/ - PuTTY is an SSH and telnet client
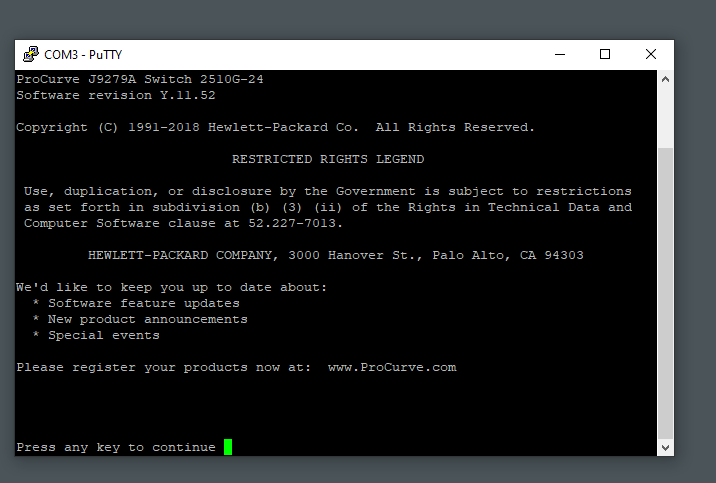
Result:
Basic Setup:
# Setting IP
config
vlan 1 ip address <xxx.xxx.xxx.xxx> /255.255.255.0

# Saving Config
write memory

exit
exit
y
Accessing via Browser (using Java):

(works only in IE)
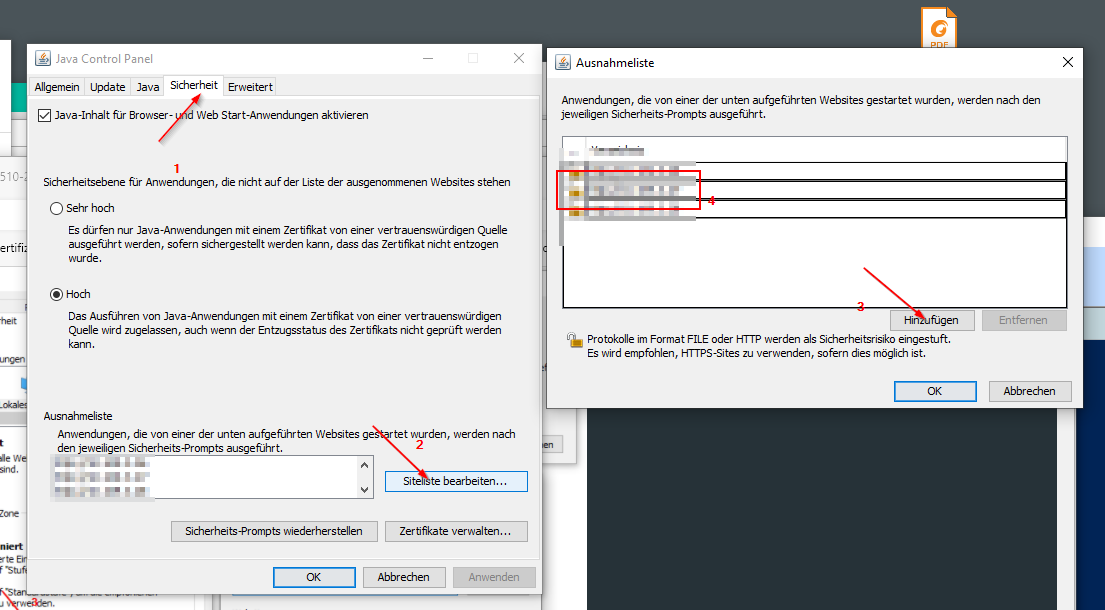
- adding the management website to the intranet security zone...

- install Java - Download Java for Windows
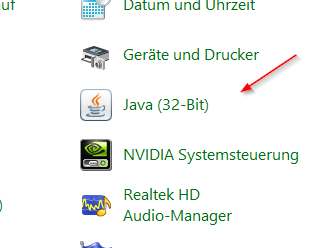
- open the Control Panel
- adding the management website to the exceptionlist in java...
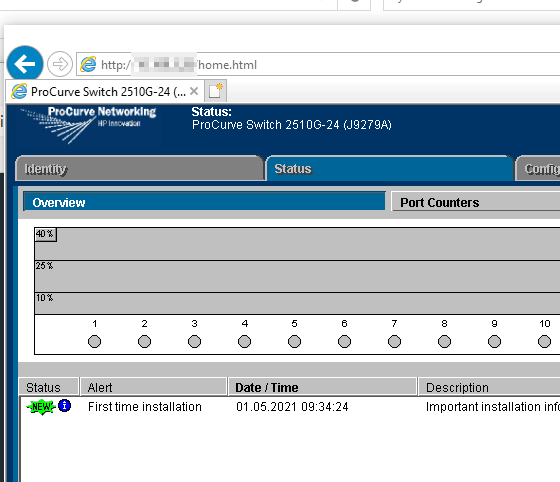
- opening the management portal of the switch
Sources:
Link1 - How to reset a ProCurve 2510-24g to default settings
https://www.dhcpserver.de/cms/running_the_server/
https://support.hpe.com/hpesc/public/docDisplay?docId=c02270579&docLocale=en_US